This pattern is part of a series I'm working on that fit together to form an anatomically correct human brain. The cerebellum plays an important role in balance control, whilst the brainstem governs a wide variety of important functions, including heart rate, breathing, and temperature regulation.

Difficulty:

Medium
You will need:
- A 2.5mm crochet hook
- White #10 crochet cotton (optional)
- Anchor creativa fino cotton in green and light purple
- Polyester toy stuffing
- A darning needle
Rejoin yarn to the st after the new st you created when fastening off neatlyRound 4: Sc in the back loop of this st and the next 22sts (23sc)Round 5: In the front loop of each st: sc4, make 3sc in the next st, sc7, (make 2sc in the next st, sc) 3 times, sc3, hdc, make 2hdc in the last st (29sts)Round 6: Hdc, make 2hdc in the next st, hdc, sc, sc2tog, sc9, make 2sc in the following st, sc, make 2sc in each of the next 2sts, sc2, make 2hdc in each of the following 2sts, sc3, make 2sc in the next st, sc2 (35sts)Round 7: Sc4, make 2sc in the next st, sc14, make 2sc in the following st, sc15 (37sc)Round 8: Sc2, make 2sc in the next st, sc25, sc2tog, sc7 (37sc)Round 9: Sc2, make 2sc in the next st, sc15, sc2tog, sc3, sc2tog, sc4, sc2tog, sc6 (35sc)Round 10: Sc, sc3tog, sc in the front loop only of the next 16sts, sc8, sc2tog, sc3, sc2tog (31sc)Round 11: Sc in each stRound 12: Sc, sc2tog, sc15, sc2tog, sc4, sc2tog, sc4, sc2tog (27sc)Round 13: Sc in each stRound 14: Sc2tog twice, sc13, sc2tog twice, sc7 (23sc)Round 15: Sc in each stRound 16: Sc2tog, sc12, sc2tog twice, sc6 (21sc)Round 17: Sc13, sc2tog, sc6 (20sc)Round 18: Sc, sc2tog, sc7, sc2tog 3 times, sc4 (16sc)StuffRound 19: Sc2tog twice, sc4, sc3tog twice, sc2 (10sc)Round 20: Sc3tog, slip1 (8sc)Fasten offFor the right cerebellum:Make a magic loop with 6scRound 1: make 2hdc in the first st, make 2sc in each of the next 3sts, make 2hdc in the following st, make 2sc in the last st (12sts)Round 2: Sc, make 2sc in the next st, sc2, make 2hdc in each of the following 2sts, sc3, make 2hdc in each of the next 2sts, sc (17sts)Round 3: Slip3, (sc, make 2sc in the next st), 3 times, sc, slip2, make 2sc in the following st, make 2hdc in the next st, hdc, make 2sc in the following st, slip1 (23sts)Fasten off neatlyRejoin yarn to the st before the new st you created when fastening off neatlyRound 4: Sc in the back loop of this st and the next 22sts (23sc)Round 5: In the front loop of each st: make 2hdc in the first st, hdc, sc4, (make 2sc in the next st, sc) 3 times sc6, make 3sc in the following st, sc4 (29sts)Round 6: Sc2, make 2sc in the next st, sc3, make 2hdc in each of the following 2sts, sc2, make 2sc in each of the next 2sts, sc, make 2sc in the following st, sc9, sc2tog, sc, hdc, make 2hdc in the next st, hdc (36sts)Round 7: Sc15, make 2sc in the next st, sc14, make 2sc in the following st, sc4 (38sc)Round 8: Sc7, sc2tog, sc24, make 2sc in the next st, sc3 (38sc)Round 9: Sc4, sc2tog, sc4, sc2tog, sc3, sc2tog, sc15, make 2sc in the next st, sc3, sc2tog (35sc)Round 10: sc3, sc2tog, sc9, sc in the front loop only of the next 16sts, sc3tog, sc2 (32sts)Round 11: Sc in each stRound 12: sc4, sc2tog, sc4, sc2tog, sc15, sc2tog, sc, sc2tog (28sc)Round 13: Sc in each stRound 14: (Note that this is slightly more than 1 round) Sc8, sc2tog twice, sc13, sc2tog twice (24sc)Round 15: Sc in each stRound 16: Sc6, sc2tog twice, sc12, sc2tog (21sc)Round 17: Sc7, sc2tog, sc12 (20sc)Round 18: Sc5, sc2tog 3 times, sc6, sc2tog, sc (16sc)StuffRound 19: (slightly more than 1 round) sc4, sc3tog twice, sc3, sc2tog twice (10sc)Round 20: Sc3, sc3tog, slip1 (8sc)Fasten off
You may now want to shape the 2 hemispheres of your cerebellum. This is done by using a needle and thread to make stitches at strategic points in the structure, as shown in the images below.


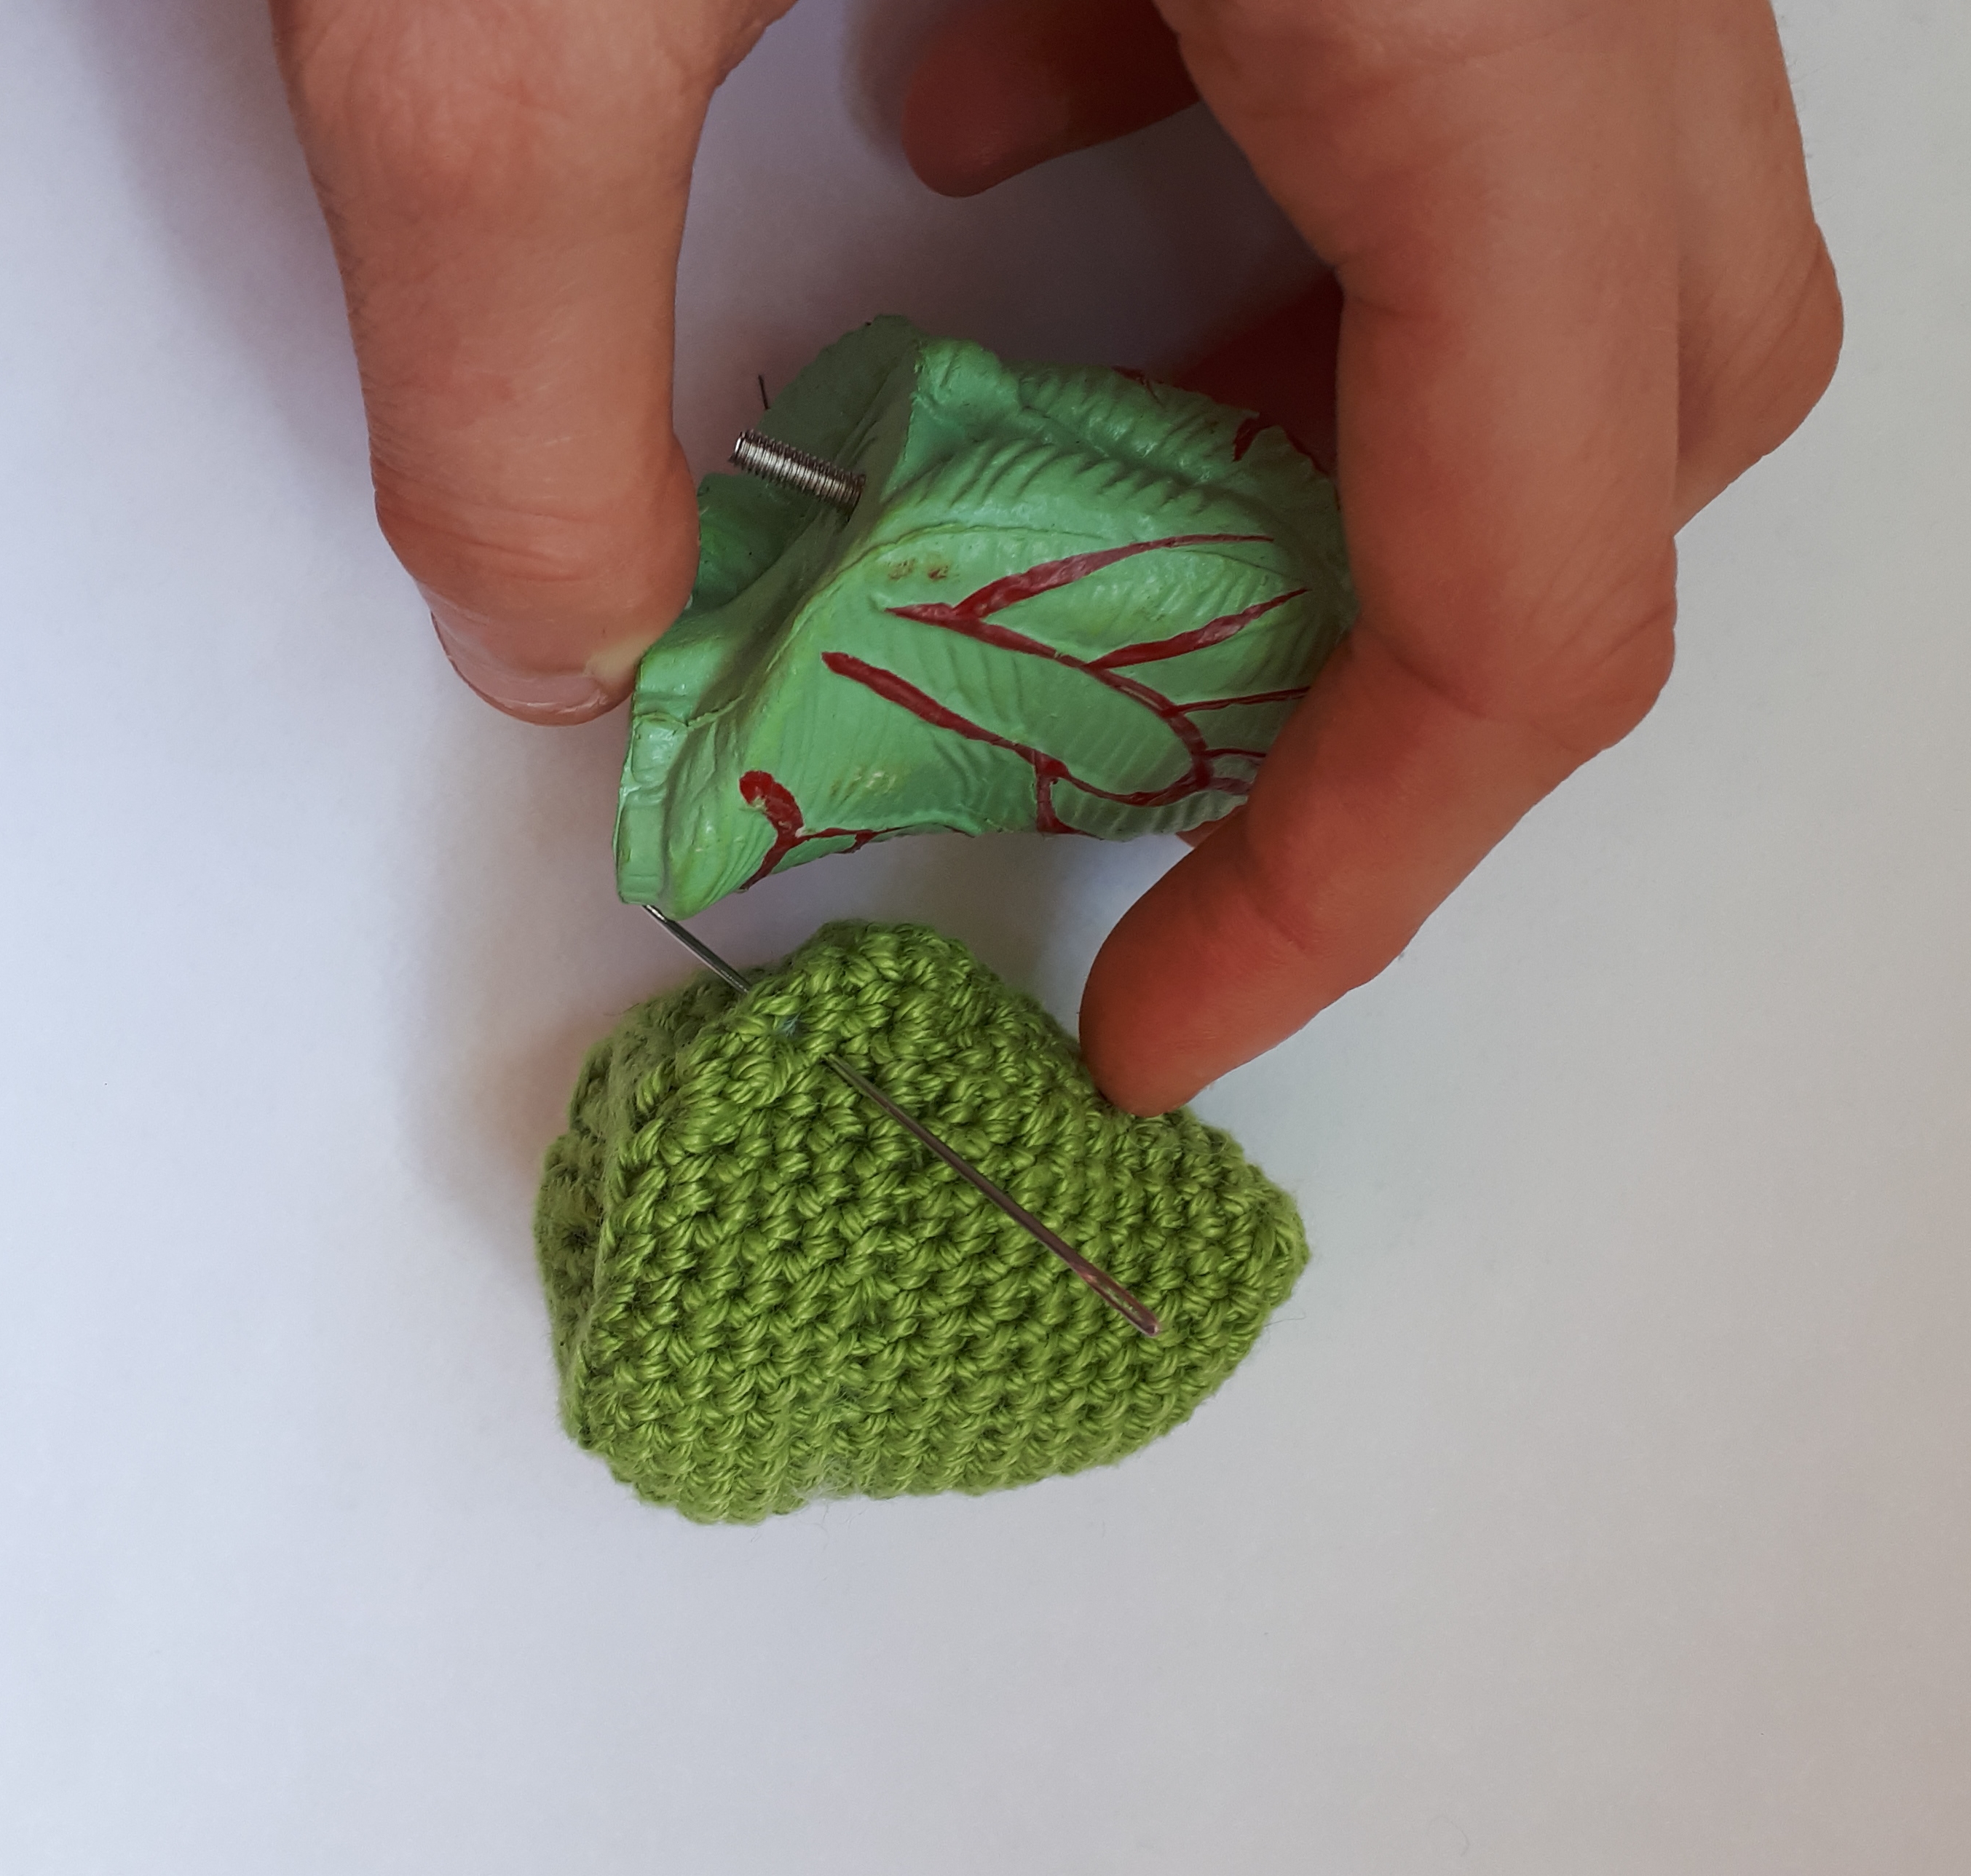


You may wish to embroider the internal structure onto the end (the section surrounded by the line made from crocheting in the back loop of each st). This can be seen in the images below.


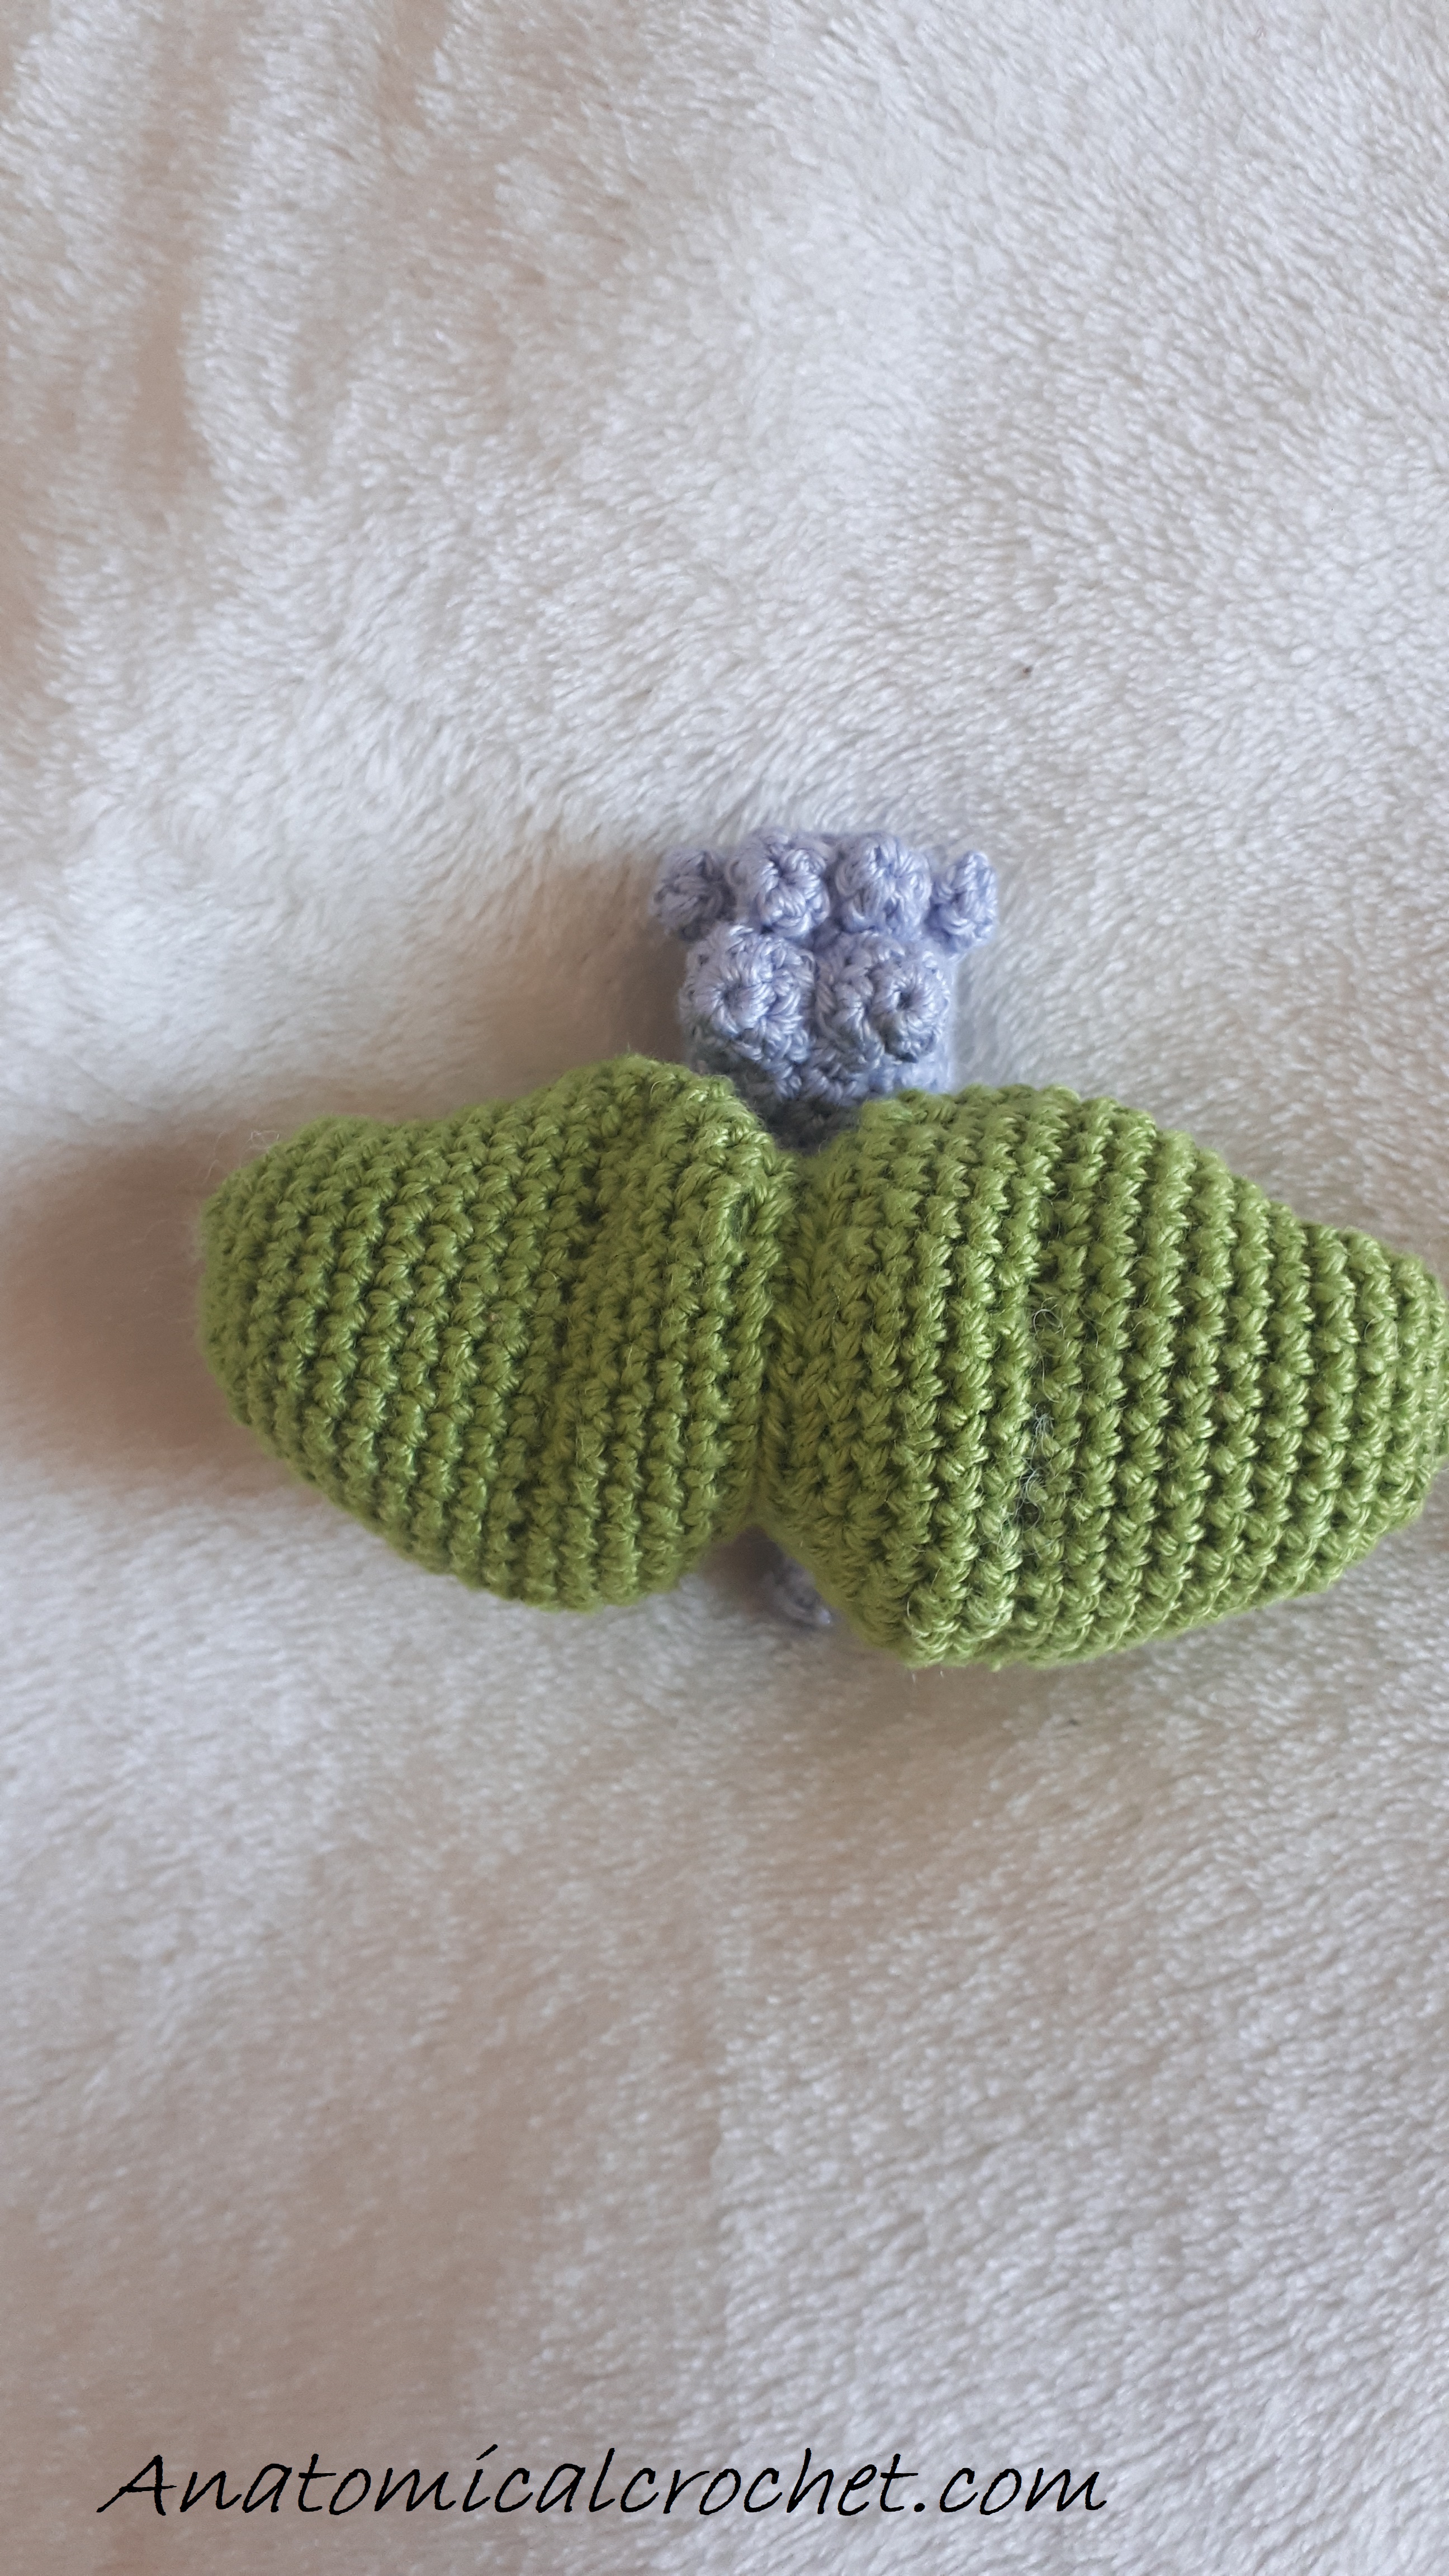
Sew the 2 sides of the cerebellum together, lining them up so that the embroidered sections are touching and they mirror each other


For the brainstem:
For the medulla oblongata:With purple ch8Row 1: Hdc in the 2nd chain st from hook, then hdc in each of the next 2 chain sts. sc in the remaining 4 chain sts. ch1, turn (7sts)Row 2: Sc4, hdc3. ch1, turnRow 3: make 3hdc in the first st, hdc2, sc4. ch1, turn (9sts)Row 4: Sc4, hdc2, hdc3tog. ch1, turn (7sts)Row 5: Hdc3, sc4. ch1, turnRow 6: Sc4, hdc3Fasten offSew the edges parallel to the rows together, as shown below
 For the pons:Rejoin yarn to the seam of the medulla oblongata.
 Round 1: Sc in this seam and then sc9 around the top edge of the medulla, trying to make sure that the stitches are as evenly spread as possible (10sc)
 Row 1.5: Slip3, ch1, turnRow 2: Slip the back loop of the first st, ch1, slip the back loop of the next st, ch1, slip the back loop of the next 2sts, ch1, (slip the back loop of the next st, ch1) twice, turn (10sts)Row 3: Skip the first chain st then slip the back loop of the next 10sts/chain sts. Ch1, turnRow 4: Slip the back loop of each st. turnRow 5: In the back loop only: slip3, sc4, slip3. turnRow 6: In the front loop only: slip3, sc4, slip3. turnRow 7: In the back loop only: slip3, sc4, slip3. turnRow 8: In the front loop only: slip3, sc4, slip3. turnRow 9: In the back loop only: slip3, sc4, slip3Fasten off
Rejoin to round 1 to the st after the one you last crocheted into
 Row 2: Slip the same st and the next 3sts. turn (4sts)Rows 3 - 7: (5 rows) Slip the back loop of these 4sts. turn
Row 8: slip the back loop of these 4stsFasten offRejoin yarn to row 1, just to the left of the section you just madeRound 1: Sc6 up the side of the first section, then sc4 down the side of the 2nd section you made, so that your return back to where you started (10sts) (see images below)Round 2: Sc2tog 5 times (5sc)Fasten off


 For the midbrain:Ch7Row 1: Slip the 2nd chain st from hook and the next 5 chain sts. Turn (6sts)Rows 2 - 15: (14 rows) Slip the back loop of each st, turnRows 16 - 17: (2 rows) sc in each st. ch1, turnRow 18: Sc5, make 3sc in the next st. ch1, turn (8sc)Rows 19 - 20: (2 rows) sc in each st. ch1, turnRow 21: Sc3tog, sc5. ch1, turn (6sc)Row 22: sc in each st. ch1, turnRow 23: sc in each stFasten offSew the cast on and cast off edges togetherFor the superior colliculi (make 2):Make a magic loop with 6scSlip to secureFasten offSew to the upper edge of the front of the brain stem, around the rows where you made 3sc and sc3tog (but the other end), as shown below
For the inferior colliculi (make 2):make a magic loop with 6scRound 1: (sc, make 2sc in the next st) 3 times (9sc)Fasten offSew underneath the superior colliculi

For the medial geniculate bodies (make 2):make a magic loop for 4scSlip to secureFasten offSew either side to the superior colliculiSew the midbrain to the top of the pons. The vertical striped section should line up with the larger of the 2 horizontal striped sections on the pons.Stuff


 Ch7Row 1: Sc in the 2nd chain st from hook and the next 5 chain sts. ch1, turn (6sc)Row 2: Sc2tog, sc2, sc2tog. ch1, turn (4sc)Row 3: Sc2tog twice (2sc)Fasten offSew this to the top of the midbrain, as shown below
That's all from this pattern - I hope you have enjoyed it! If you have any questions please feel free to email them to me at lhodginscrochet@gmail.com. You can also contact me on my Instagram, which you can follow to be kept up to date with what I'm working on.
As alwas you are very welcome to sell finished products but I do ask that you don't re-post this pattern or claim it as your own. Thank you!
No comments:
Post a Comment